JSON Monitor
Available in Starter plan and above
What is a JSON monitor?
JSON (JavaScript Object Notation) is a standard format for data interchange on the web. It’s widely used in APIs and web services for its efficiency in organizing data and ease of parsing.
A JSON monitor automatically tracks changes in JSON data at a given URL and sends alerts when the content, structure, or values change. This is useful for monitoring:
- API responses and endpoints
- E-commerce product data
- News feeds and aggregators
- Financial services data
- Social media platform APIs
- Real-time data feeds
URL parameters
JSON monitors automatically load URL parameters (key-value pairs) if present in the URL.
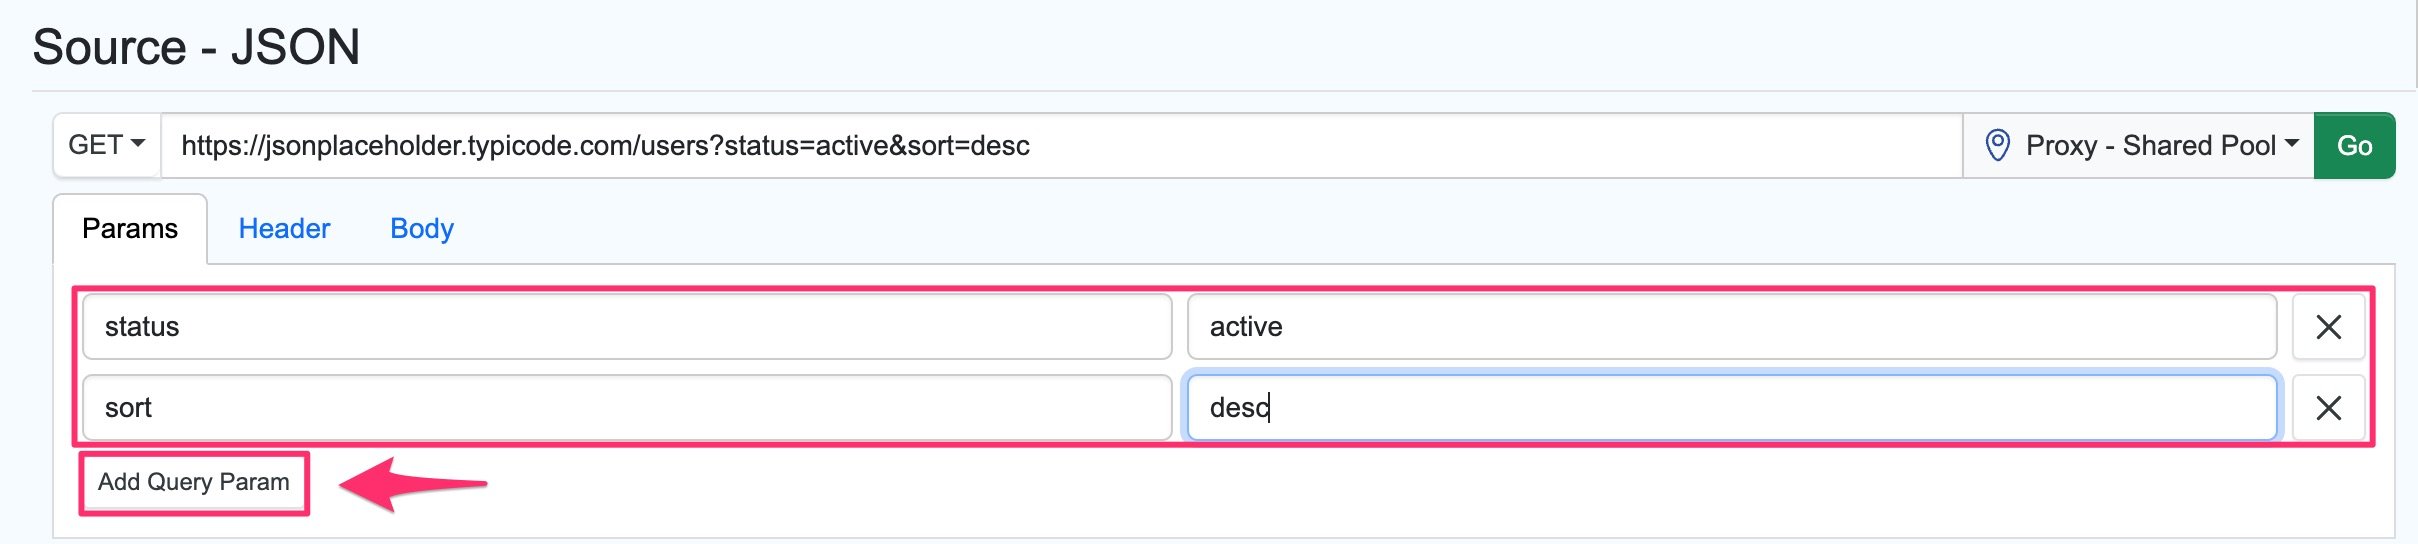
Click Add Query Param to add additional parameters or headers as needed.
Supported HTTP methods
- GET — Retrieves data from a resource (most common for JSON monitoring)
- POST — Creates a new resource
- PUT — Replaces an existing resource
- PATCH — Partially modifies a resource
- DELETE — Removes a resource
Set up a JSON monitor
-
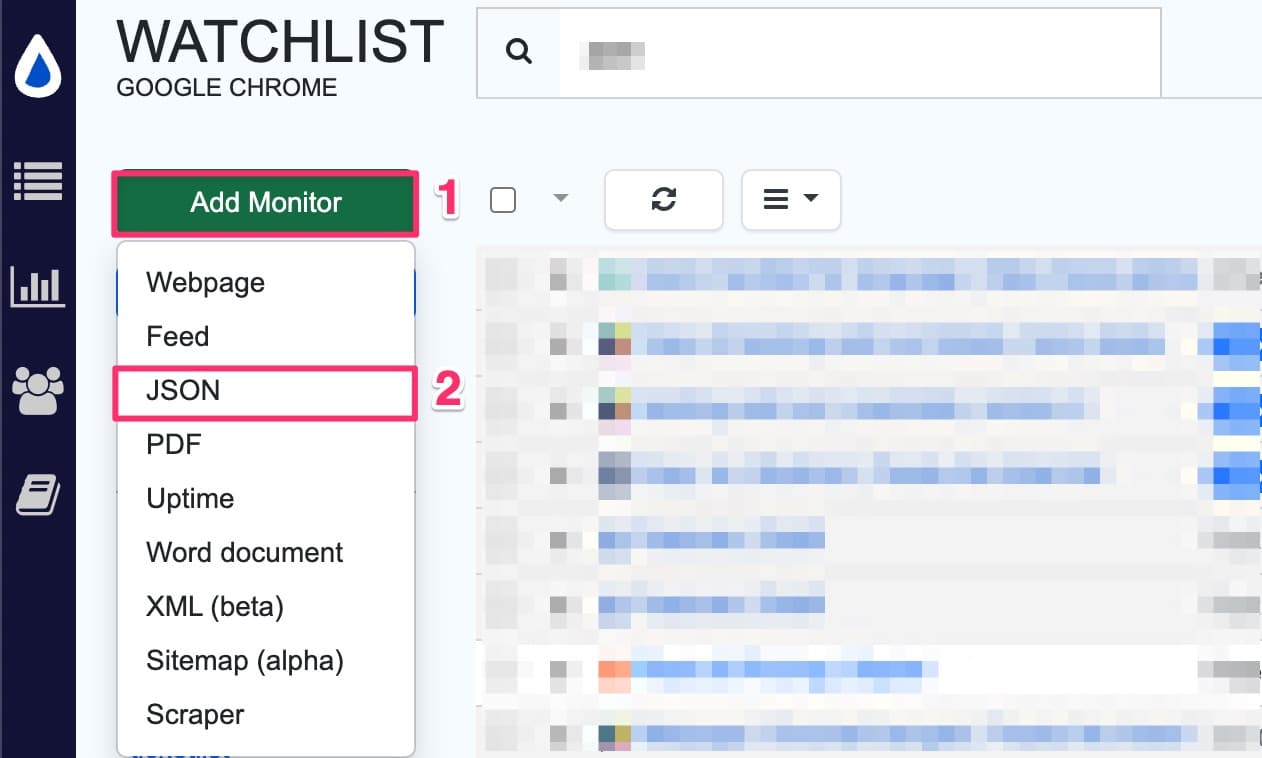
Open the Watchlist at https://monitor.distill.io or in your browser extension
-
Click Add Monitor → JSON
-
Enter the web service URL you want to monitor
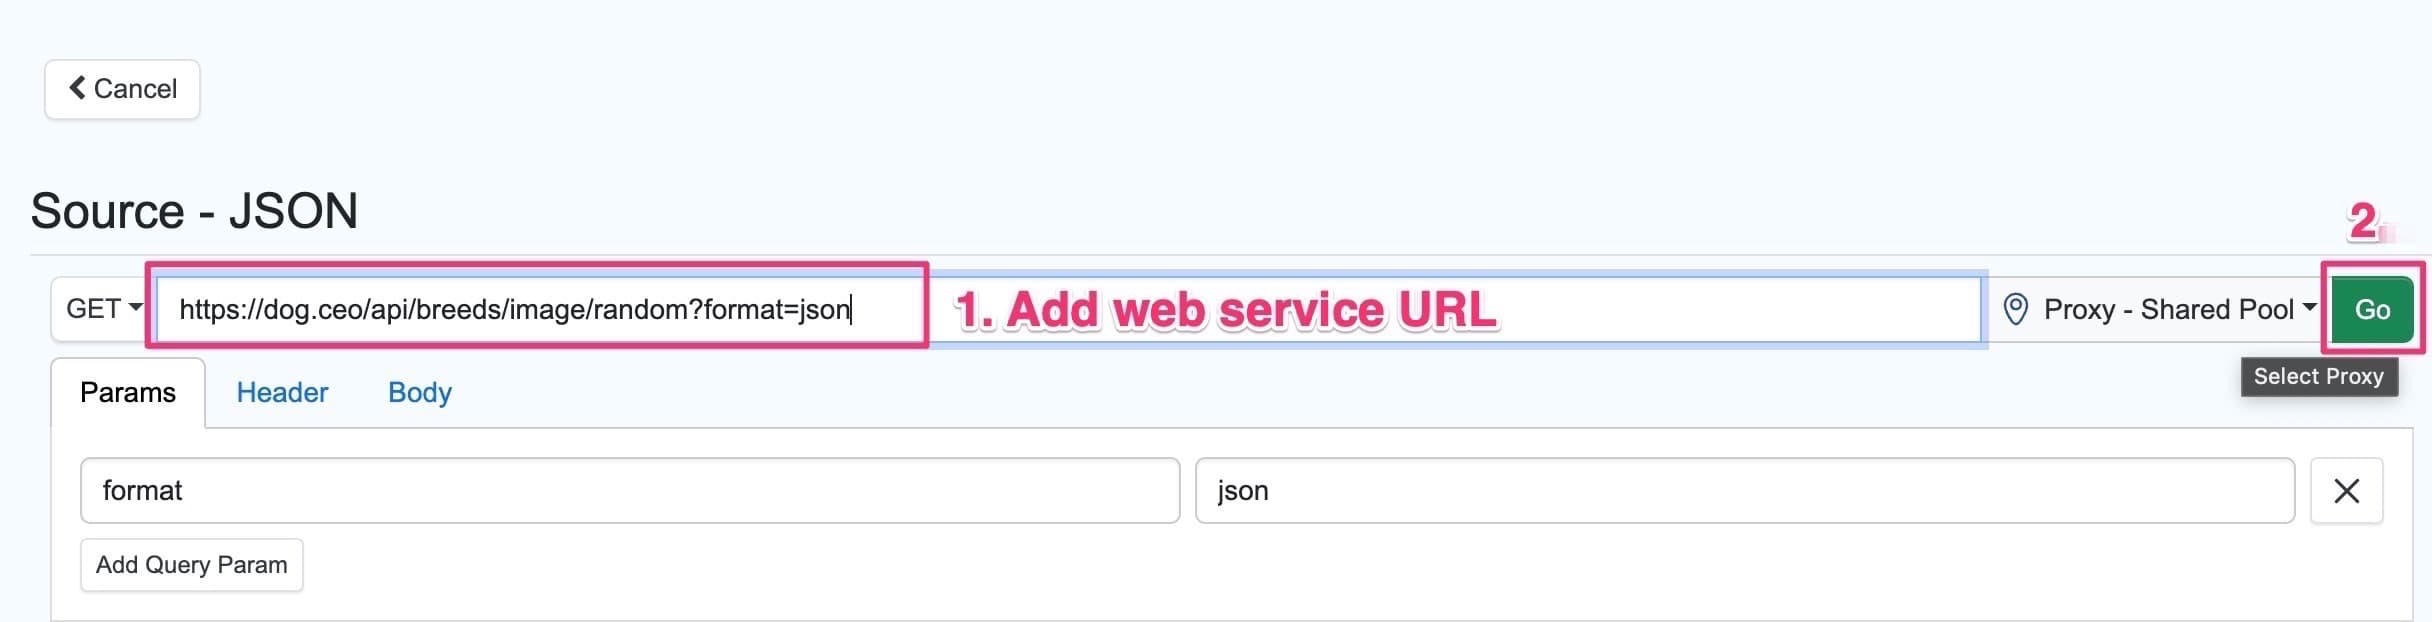
-
Click GO to send the request
-
Select the properties you want to monitor using the checkboxes
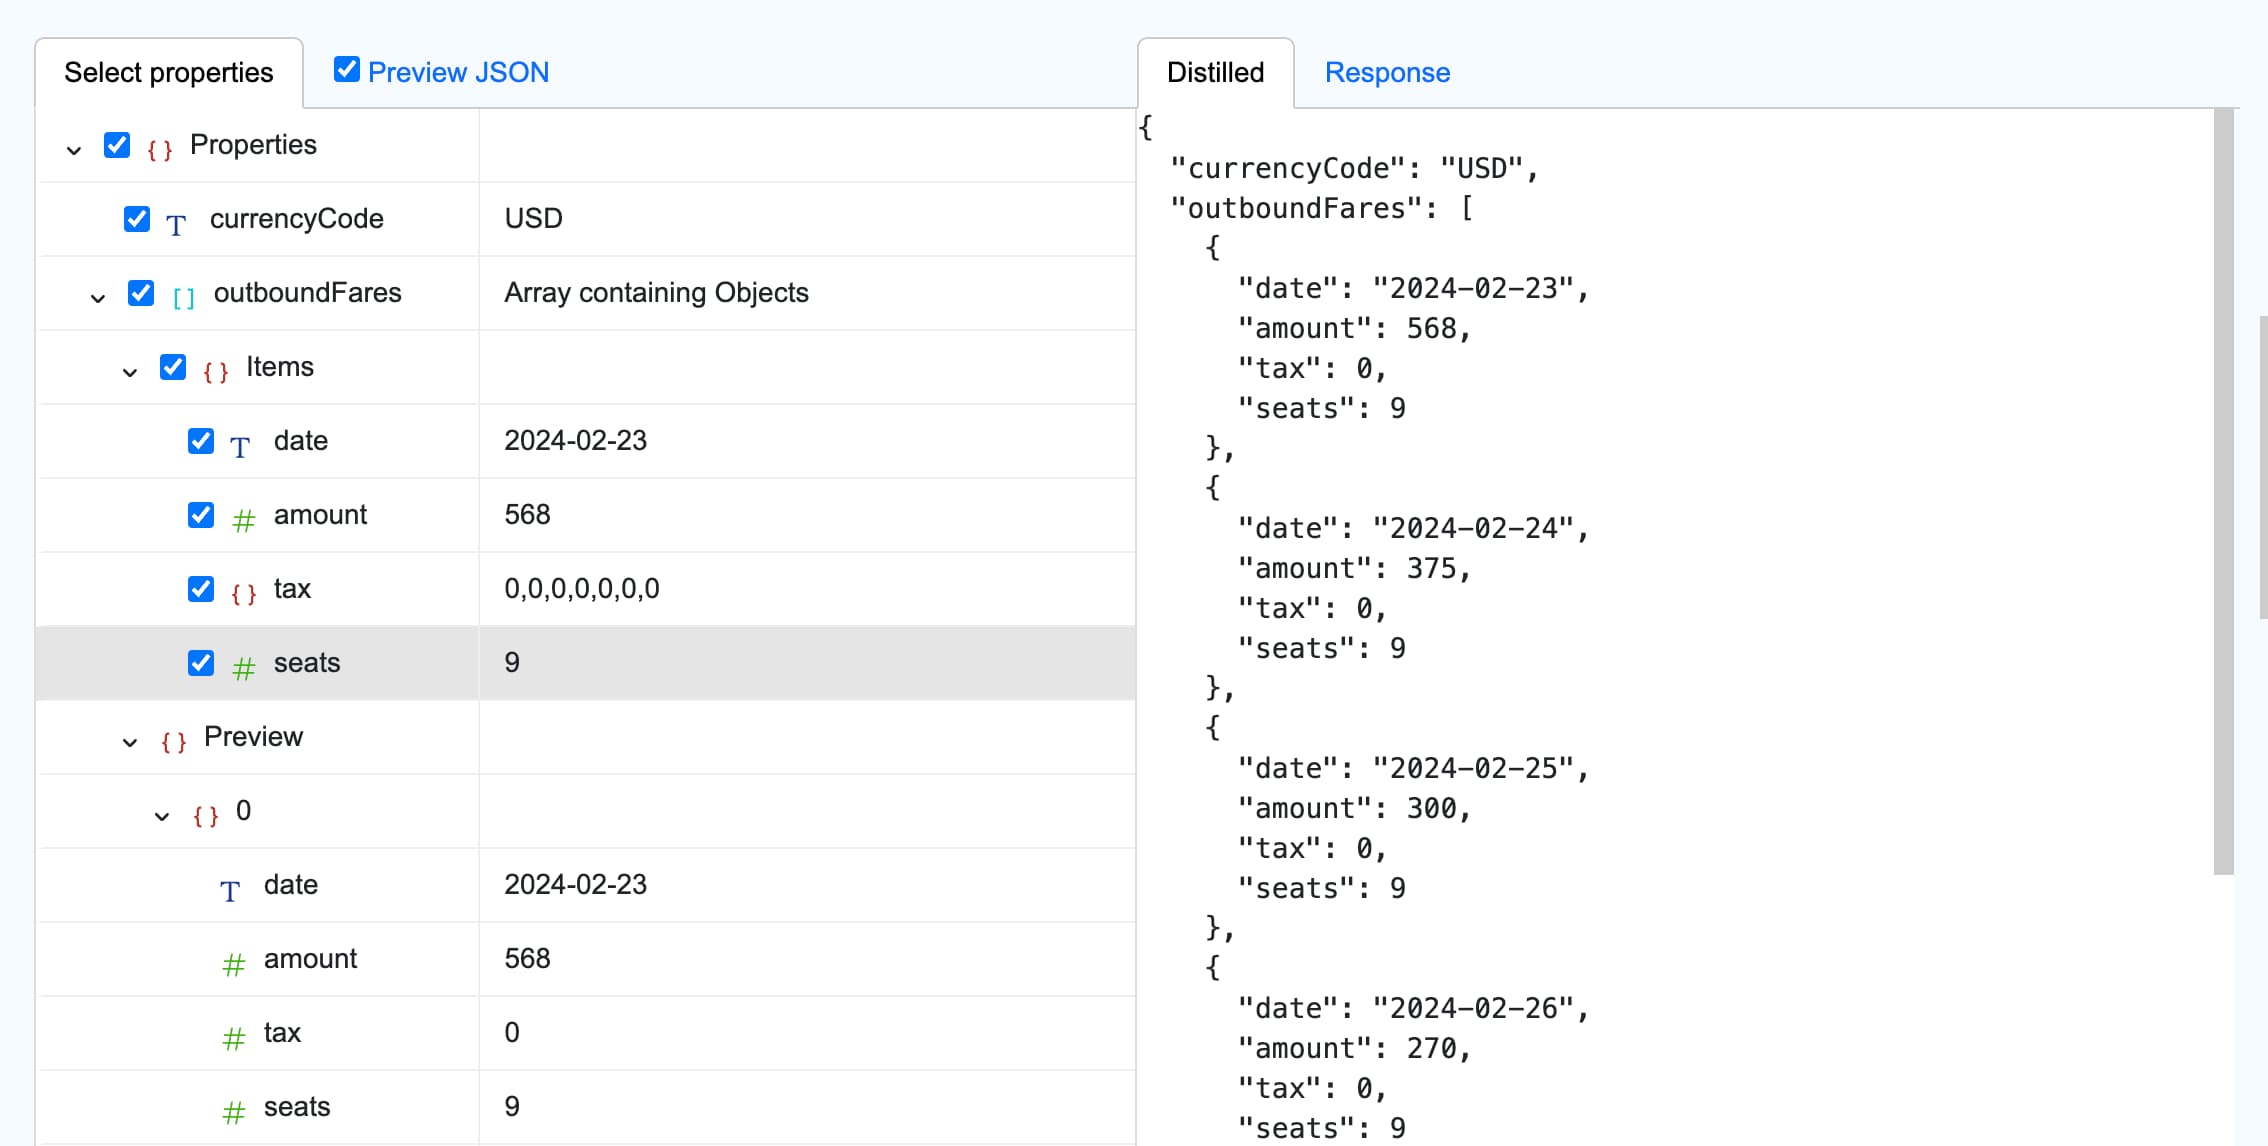
-
Click Save to open the Options page
-
Configure check interval, alert actions, and conditions
-
Click Save to add the JSON monitor to your watchlist